Jack and Jill Bathroom Remodel: Our DIY Before and After
Nope, you didn’t just step onto the set of Little House on the Prairie or The Twilight Zone. This really is how this bathroom looked when we bought the house.
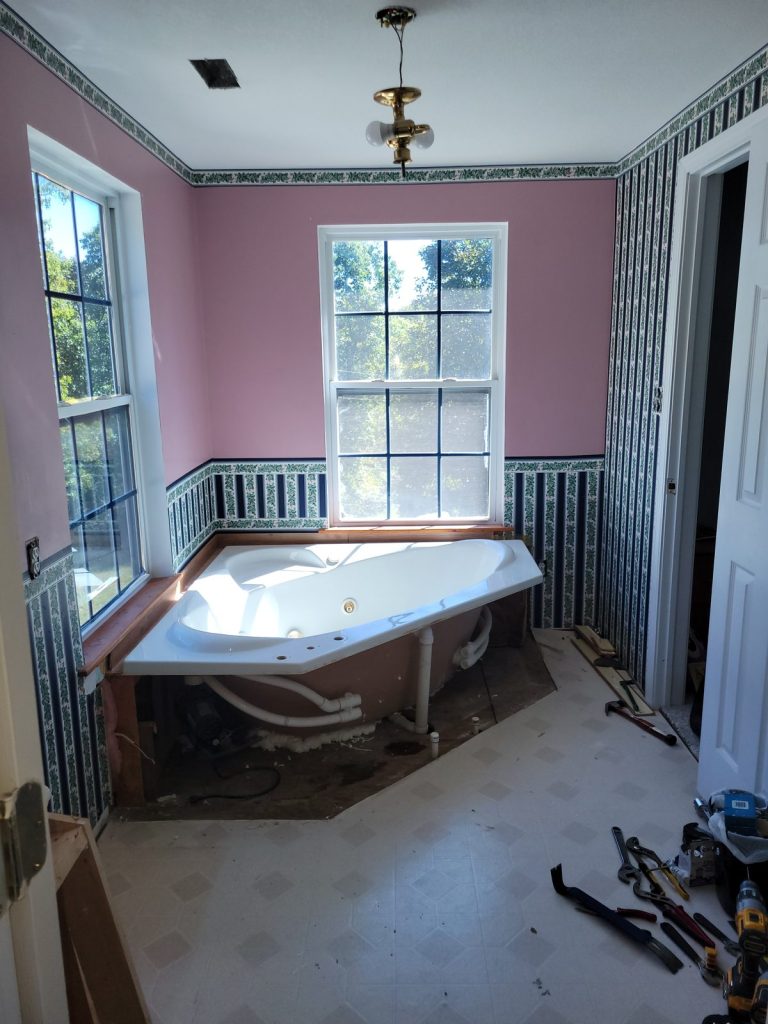
I don’t love Jack and Jill bathrooms, but there wasn’t much we could do about the layout at this point. Having four boys fighting for time and space in one is a wonderful experience I think all parents ought to be blessed to enjoy! I’d have loved to put in a shower, but the two windows and the lack of space made that impossible without turning it into a major interior and exterior project. So we did the best we could with what we had.
Project at a glance
Skill level: Intermediate (basic plumbing, electrical and tile)
Biggest change: swapping a huge corner jet tub for a standard tub
Free download: Planning your own bathroom remodel? Grab our free Bathroom Remodel Planner. It has the step order we followed, a materials and tools checklist, a budget tracker and a before/after page.
Free Bathroom Remodel Planner
7 printable pages: remodel order checklist, materials & tools list, budget tracker and more. Sent straight to your inbox.
Step 1: Gut the room
Like all remodels, I started by completely emptying and stripping the room. The vanity came out, along with the toilet, medicine cabinet, big corner jet tub, wallpaper, lights and flooring.
Step 2: Move the tub plumbing
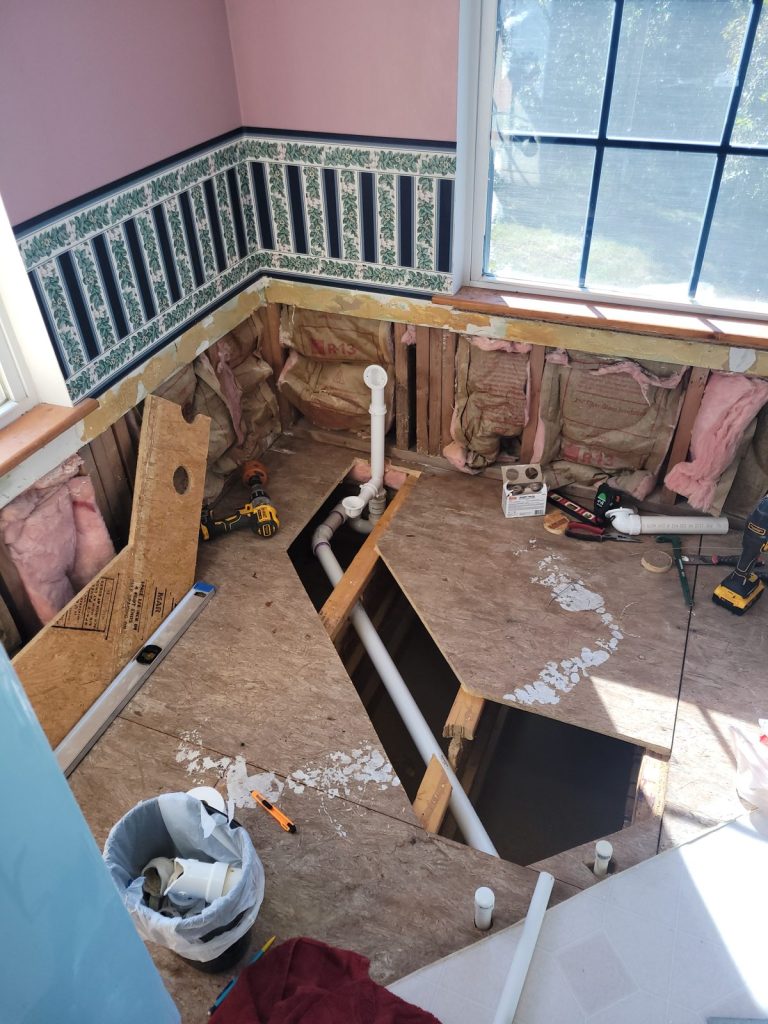
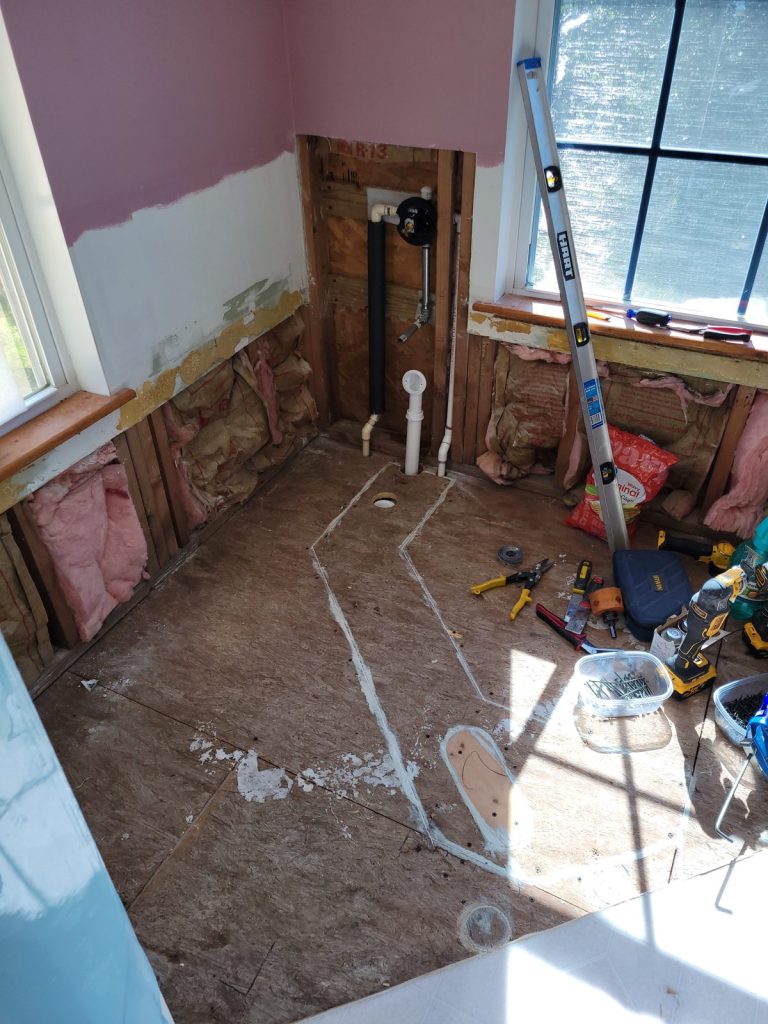
That big corner jet tub took up half the bathroom, so we replaced it with a smaller, traditional tub. With a fresh canvas, I measured and marked the floor where I needed to cut so I could relocate the plumbing.
I tied into the original drain and extended it to the new location with new PVC pipe, a P-trap and drain. I did the same with the hot and cold supply lines. The house used PVC and CPVC throughout, so that’s what I used to extend the water supply to the new tub.

Step 3: Update the electrical
Once the plumbing was done, I patched the subfloor and moved on to electrical. I cut out the old ceiling fixture and cut a 6-inch hole for a new LED flush-mount light. I also ran new wire for a light above where the vanity and mirror would go.
Last, I found the first outlet in the bathroom circuit and replaced it with a GFCI outlet. Because the other bathroom outlets are downstream from it, that one GFCI protects them all. (If you’re not comfortable with electrical, this is the step to hire out.)
Step 4: Rounded corners, mud, texture and paint
Next came corners and mud. I installed rounded corner bead on both windows, mudded them and patched any gouges in the walls.
After sanding, I sprayed the ceiling with Kilz primer, then gloss white interior paint. Once the ceiling was good and dry, I masked it off about two feet out from the walls, masked the windows and new plumbing, and textured the walls. The next day I sprayed Kilz primer on the walls, followed by two coats of semi-gloss blue-gray.
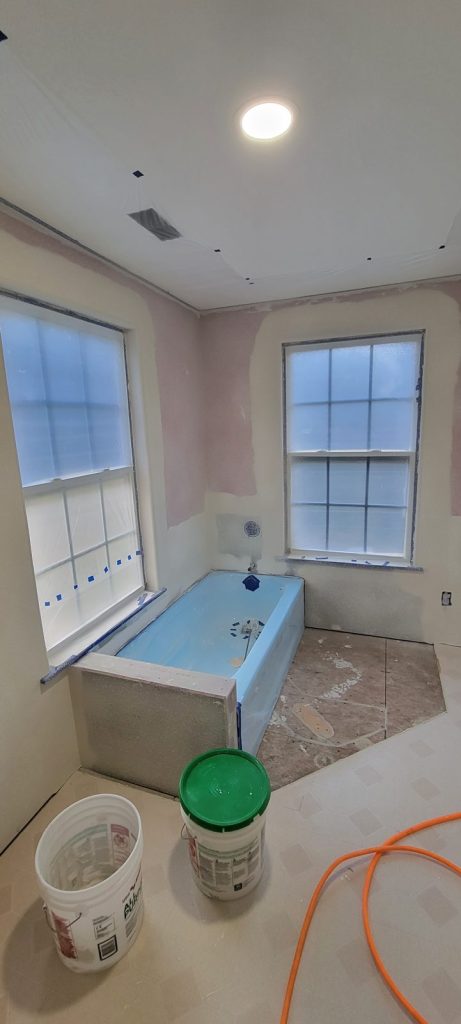

I could really see the progress at this point. The confidence grew, and the work started to feel easier and more enjoyable.
Step 5: Set the new tub
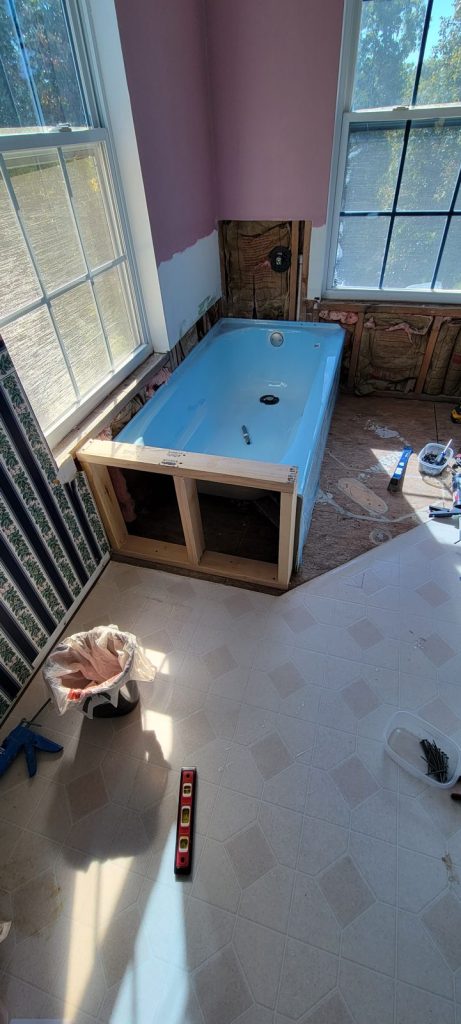
I set the tub in place and hooked up the drain and new faucet. The end of the tub was open, so I built a small half wall to support and enclose it. Then I fastened the tub securely to the walls on all three sides. To hide the tub lip, I added tile around the tub and on the new half wall.


Step 6: Tile the floor
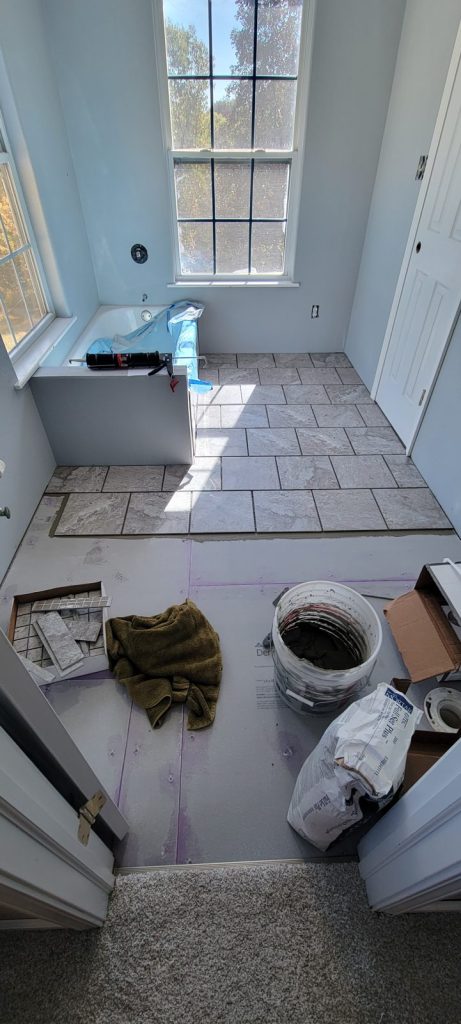
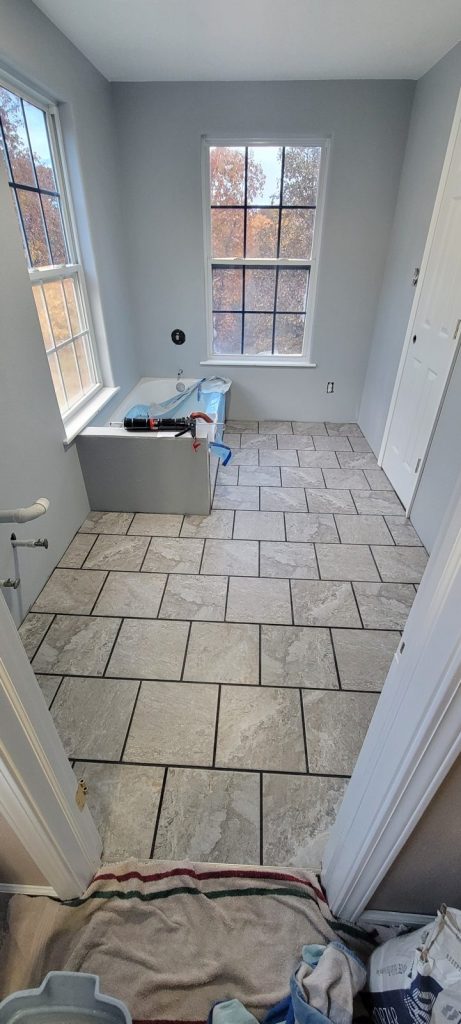
Tile was the obvious choice for a bathroom floor full of boys. Because the existing floor was wood, I first laid quarter-inch tile backer board so the mortar and tile would bond properly. I also installed metal transition strips at both doorways where tile meets carpet.
Laying the tile was fairly straightforward and went quickly… until I accidentally kicked my bucket of dark gray grout onto the brand-new light gray carpet in one of the bedrooms. That one still stings a bit, and it’s a story for another post.
Lesson learned: lay a drop cloth in every doorway before you mix grout.
Step 7: Vanity, fixtures and finishing touches
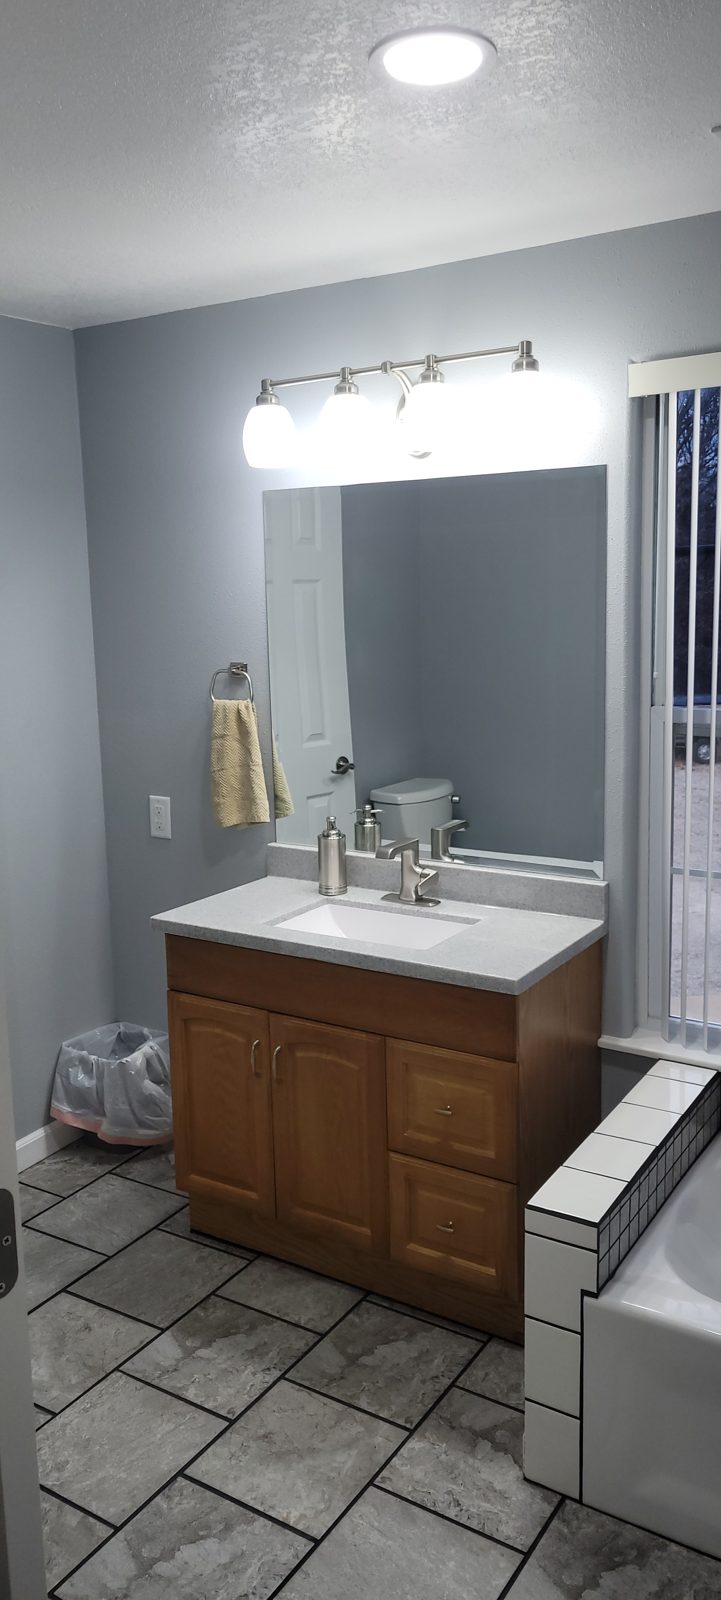
OK, now the hard parts were done. The original vanity didn’t look too bad, so we kept it: I repainted the doors and swapped the knobs and hinges for brushed nickel to match the rest of the bathroom. I hooked up the new one-piece sink and faucet that came with the vanity top.
Then came the satisfying part: new mirror, new toilet, toilet paper holder, towel bars, window blinds, the LED ceiling light and an LED vanity light bar.
There wasn’t room for a proper linen closet, so I used leftover shelving material to build a small, simple towel and toilet paper rack that tucks into the corner.
The After
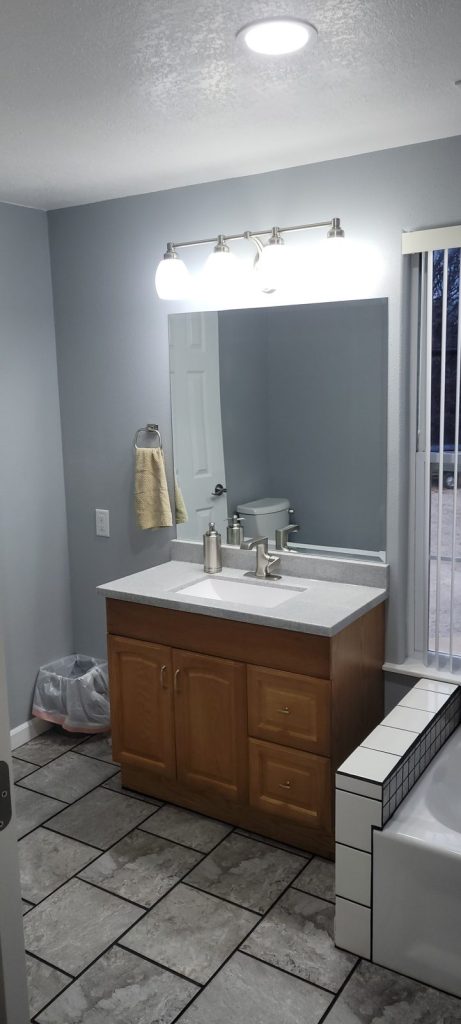
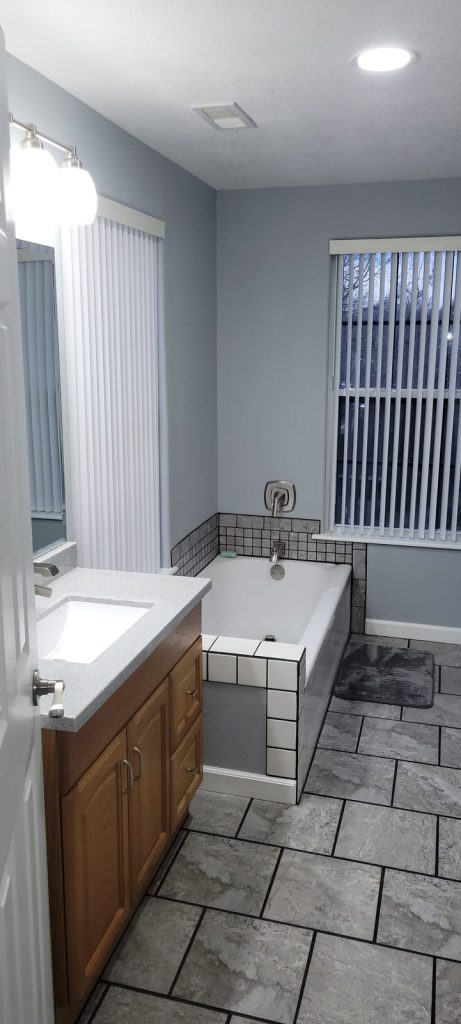


And just like that, it all came together. It still isn’t my ideal layout, but we worked with what we were given, and it turned out so much nicer than the original.
Tools and materials we used
- PVC pipe, P-trap and tub drain kit
- CPVC pipe and fittings for supply lines
- LED flush-mount ceiling light, 6″
- LED vanity light bar
- GFCI outlet
- Rounded (bullnose) corner bead + all-purpose joint compound
- Drywall knives (6″ and 12″)
- Paint sprayer
- Wall texture sprayer/hopper
- Kilz primer
- Standard alcove tub + tub faucet
- 1/4″ tile backer board + thinset mortar
- Floor tile, grout and grout float
- Tile saw
- Metal tile-to-carpet transition strips
- Brushed nickel knobs, hinges, towel bars and TP holder
Some links are affiliate links. If you buy through them we may earn a small commission at no extra cost to you.
Jack and Jill bathroom remodel FAQ
Can you replace a corner jetted tub with a regular tub?
Yes. You’ll need to relocate the drain and supply lines to the new tub position and usually build a small wall or tile apron to close in the open end, which is what we did here.
Do you need tile backer board over a wood subfloor?
Yes. Tile and thinset don’t bond well to wood, and the wood moves. A 1/4″ backer board gives the tile a stable base.
How many GFCI outlets does a bathroom need?
One GFCI outlet at the start of the circuit protects every outlet downstream from it. Check your local code to be sure.
Don’t forget your free Bathroom Remodel Planner!
Free Bathroom Remodel Planner
7 printable pages: remodel order checklist, materials & tools list, budget tracker and more. Sent straight to your inbox.